Social Sign In (Optional)
This step is only necessary if you want to allow your users to sign in with Google, Microsoft, and/or Facebook. If you only need email/password authentication, you can skip this step.
Under the hood, polished uses Firebase (a Google service) to provide multiple social sign in options all from one interface. To enable social sign in with polished you will first need to create a Firebase project.
- Set up your Firebase project
Go to the Firebase console. Open your new Firebase project, go to the "Authentication" > "Sign-in method" tab, then enable the sign in providers that you want to include with your sign in page. See the below screenshot: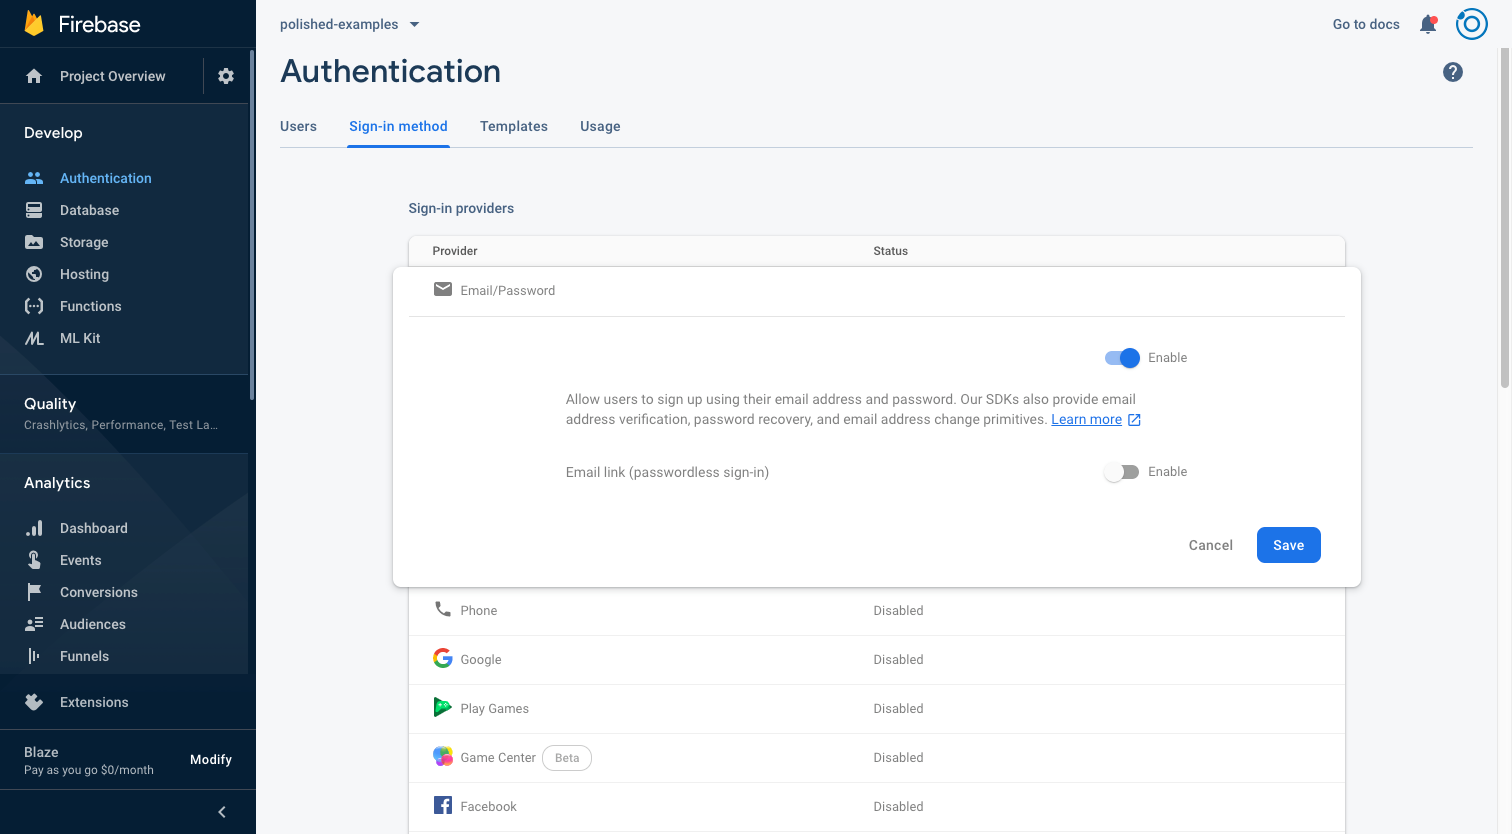
- Locate your Firebase credentials
Your Shiny app(s) will need the following credentials from your Firebase project:apiKeyauthDomainprojectId
To find the above credentials, click on the "Add Web App" button at the bottom of "General Settings" (shown in the screenshot below outlined in red). Register the App, and, back at the bottom of the "General Settings" page, your Firebase credentials will be where the "Add Web App" button was.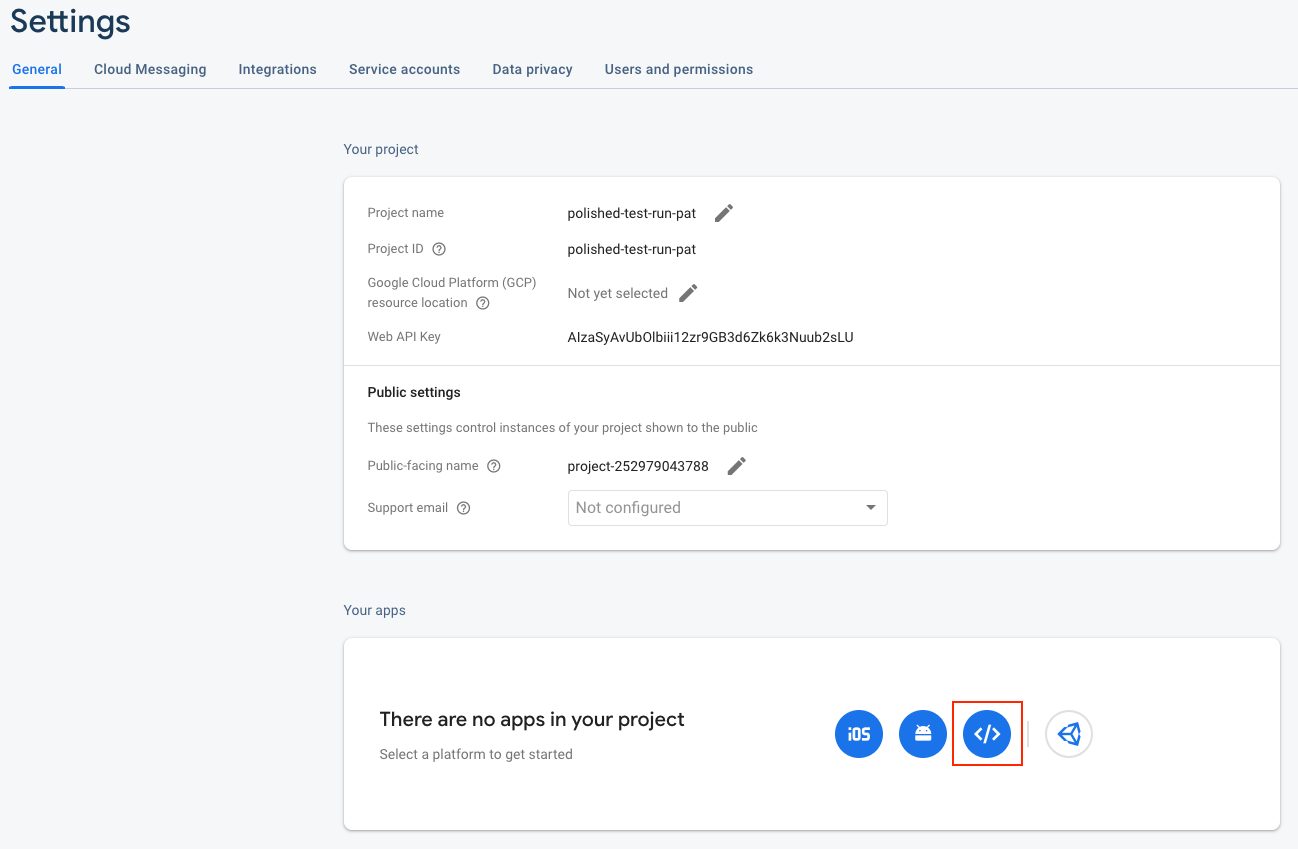
- Configure your Shiny app(s) with your Firebase credentials and preferred sign in providers
Pass your Firebase credentials to thefirebase_configargument and pass your preferred sign in providers to thesign_in_providersargument of thepolished_config()function. Yourpolished_config()should now look like this:# global.R polished_config( app_name = "your polished app name", api_key = "<your polished secret API key>", firebase_config = list( apiKey = "<your Firebase API key>", authDomain = "<your Firebase auth domain>", projectId = "<your Firebase projectId>" ), sign_in_providers = c("google", "microsoft", "facebook", "email") ) - Microsoft Sign in
- In the Firebase console, open the "Authentication" section.
- On the "Sign-in method" tab, enable the Microsoft provider.
- Add the Client ID and Client Secret from the Azure console to the Microsoft provider configuration in your Firebase console:
- To register a Microsoft OAuth client, follow the instructions in Quickstart: Register an app with the Azure Active Directory v2.0 endpoint. Note that this endpoint supports sign-in using Microsoft personal accounts as well as Azure Active Directory accounts. Learn more about Azure Active Directory v2.0.
- When registering apps with these providers, be sure to register the
*.firebaseapp.comdomain for your project as the redirect domain for your app.
- Facebook Sign in
- On the Facebook for Developers site, get the App ID and an App Secret for your app.
- Enable Facebook Login:
- In the Firebase console, open the "Authentication" section.
- On the "Sign-in method" tab, enable the Facebook sign-in method and specify the App ID and App Secret you got from Facebook.
- Then, make sure your OAuth redirect URI (e.g.
my-app-12345.firebaseapp.com/__/auth/handler) is listed as one of your OAuth redirect URIs in your Facebook app's settings page on the Facebook for Developers site in the "Product Settings" > "Facebook Login config".
Microsoft and Facebook sign in require slightly more configuration.
Note: social sign in providers require additional configuration
When using social sign in providers, in order to run your app locally, you'll need to add "127.0.0.1" as an Authorized Domain in your Firebase console in the table shown here:
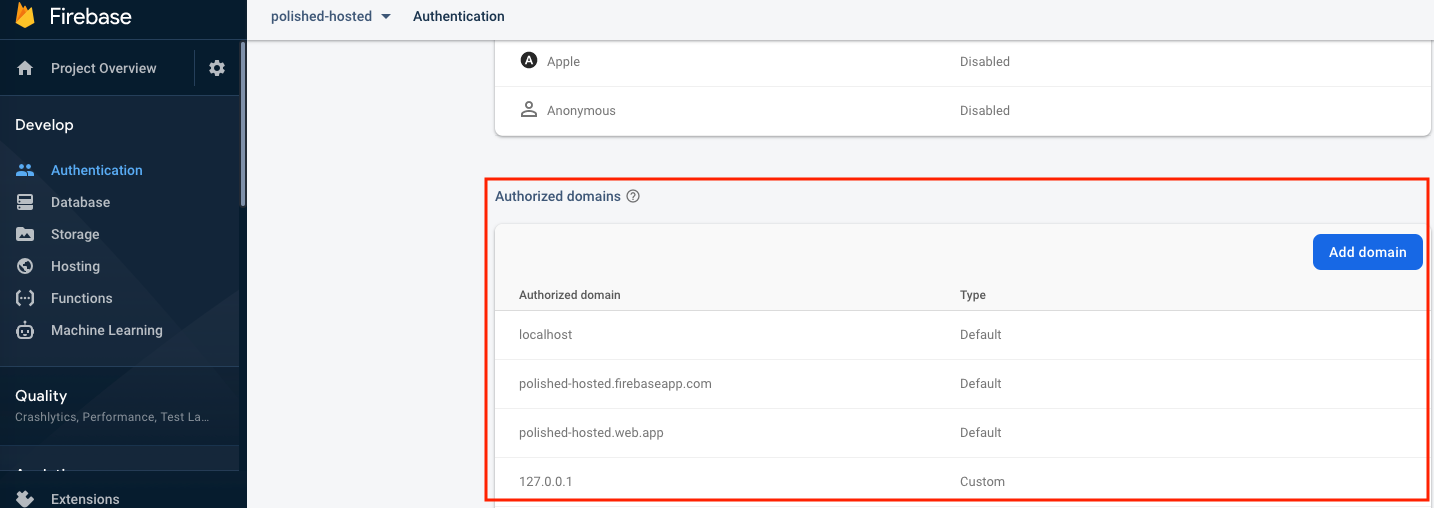
Before you deploy your app, you'll need to add your custom domain name to the above table.
When using social sign in providers, in order to run your app locally, you'll need to add "127.0.0.1" as an Authorized Domain in your Firebase console in the table shown here:
Before you deploy your app, you'll need to add your custom domain name to the above table.
Next Steps
Go to the next page for instructions on how to deploy secure a standalone Rmarkdown document.